
Attribution Modelling II: Customising Your Attribution Model
In a previous blog post, we looked at what an attribution model is, and why you need one. Now we’re taking it one step further, and telling you how you can customise your own attribution model in Google Analytics.
Why customise my attribution model?
If you read our previous blog post, you’ll know that Google Analytics comes with some baseline attribution models.
However, as we outlined previously, these baseline models aren’t always the most accurate way to report on attribution. They’re a good jumping-off point, but they won’t always take into consideration all the different variations between each business.
Not all businesses are the same, so it doesn’t make sense to use the same few attribution models. Using a better, more customised attribution model means that you’re able to better understand the value of your marketing channels.
Okay, I’m sold. How do I do it?
Head for the Model Comparison Tool, which you can find under Conversions > Attribution in Google Analytics.
From there, select ‘Create custom model’ in the drop-down menu.
1. Pick a baseline model
Google Analytics sadly does not allow you to create a custom attribution model from scratch. Instead, you have to select a baseline model and create an attribution model on top of that.
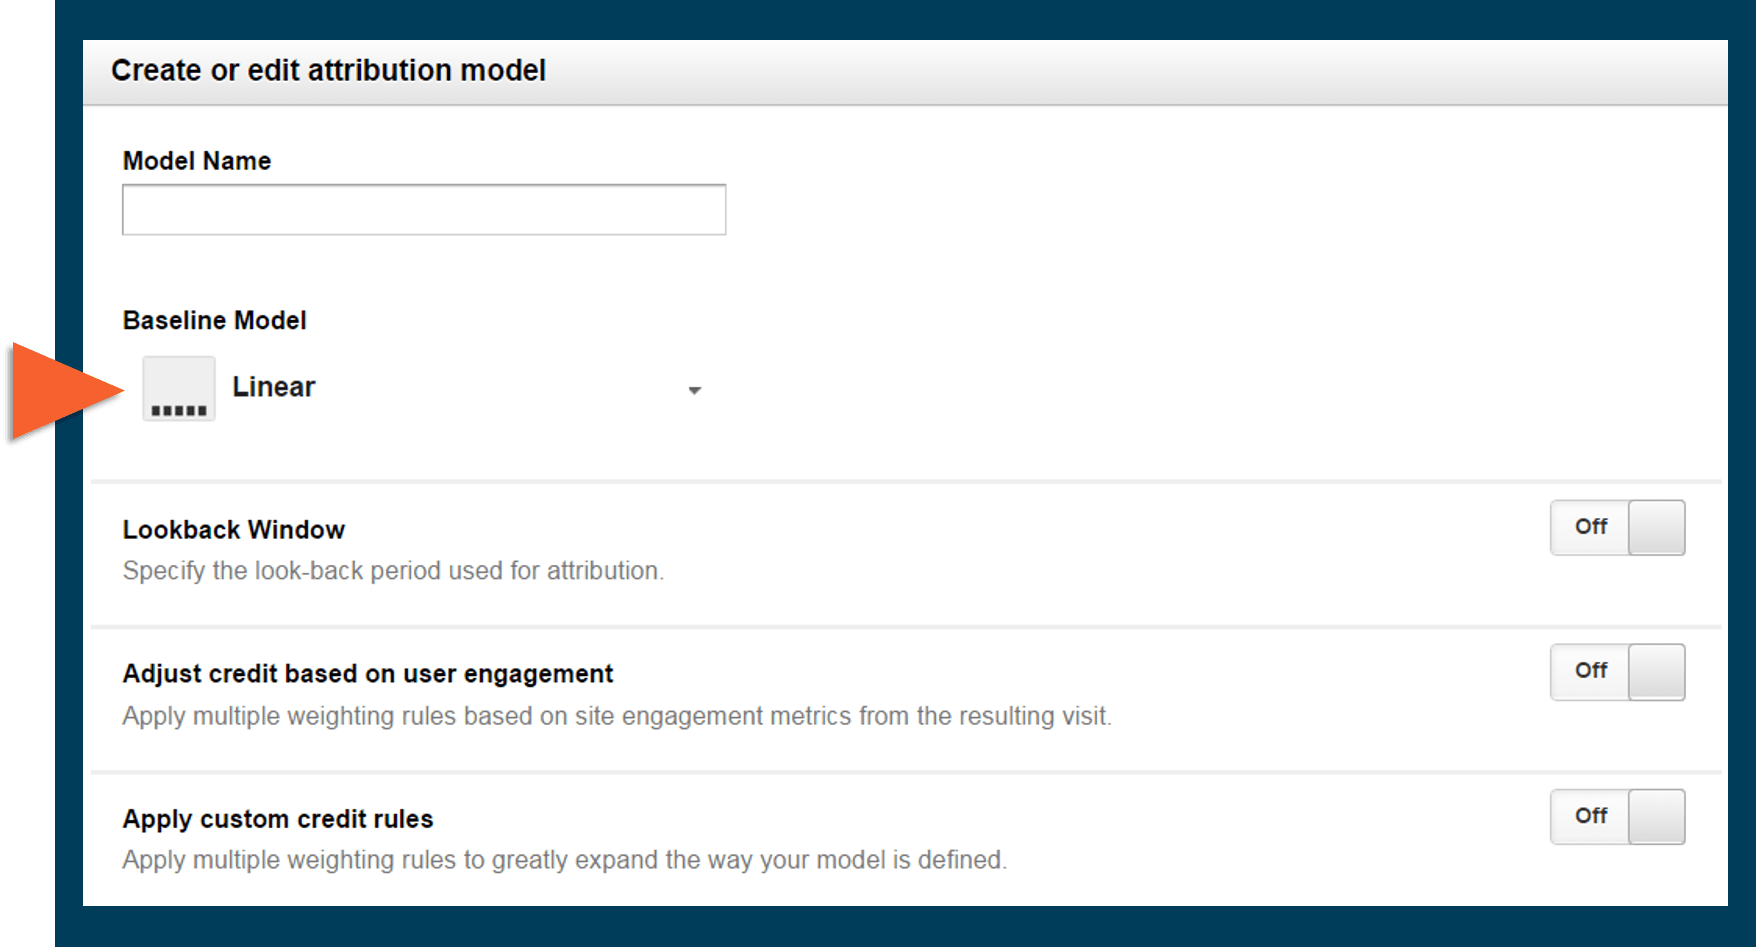
Choose the most appropriate model and you can start to add custom rules on top of it.
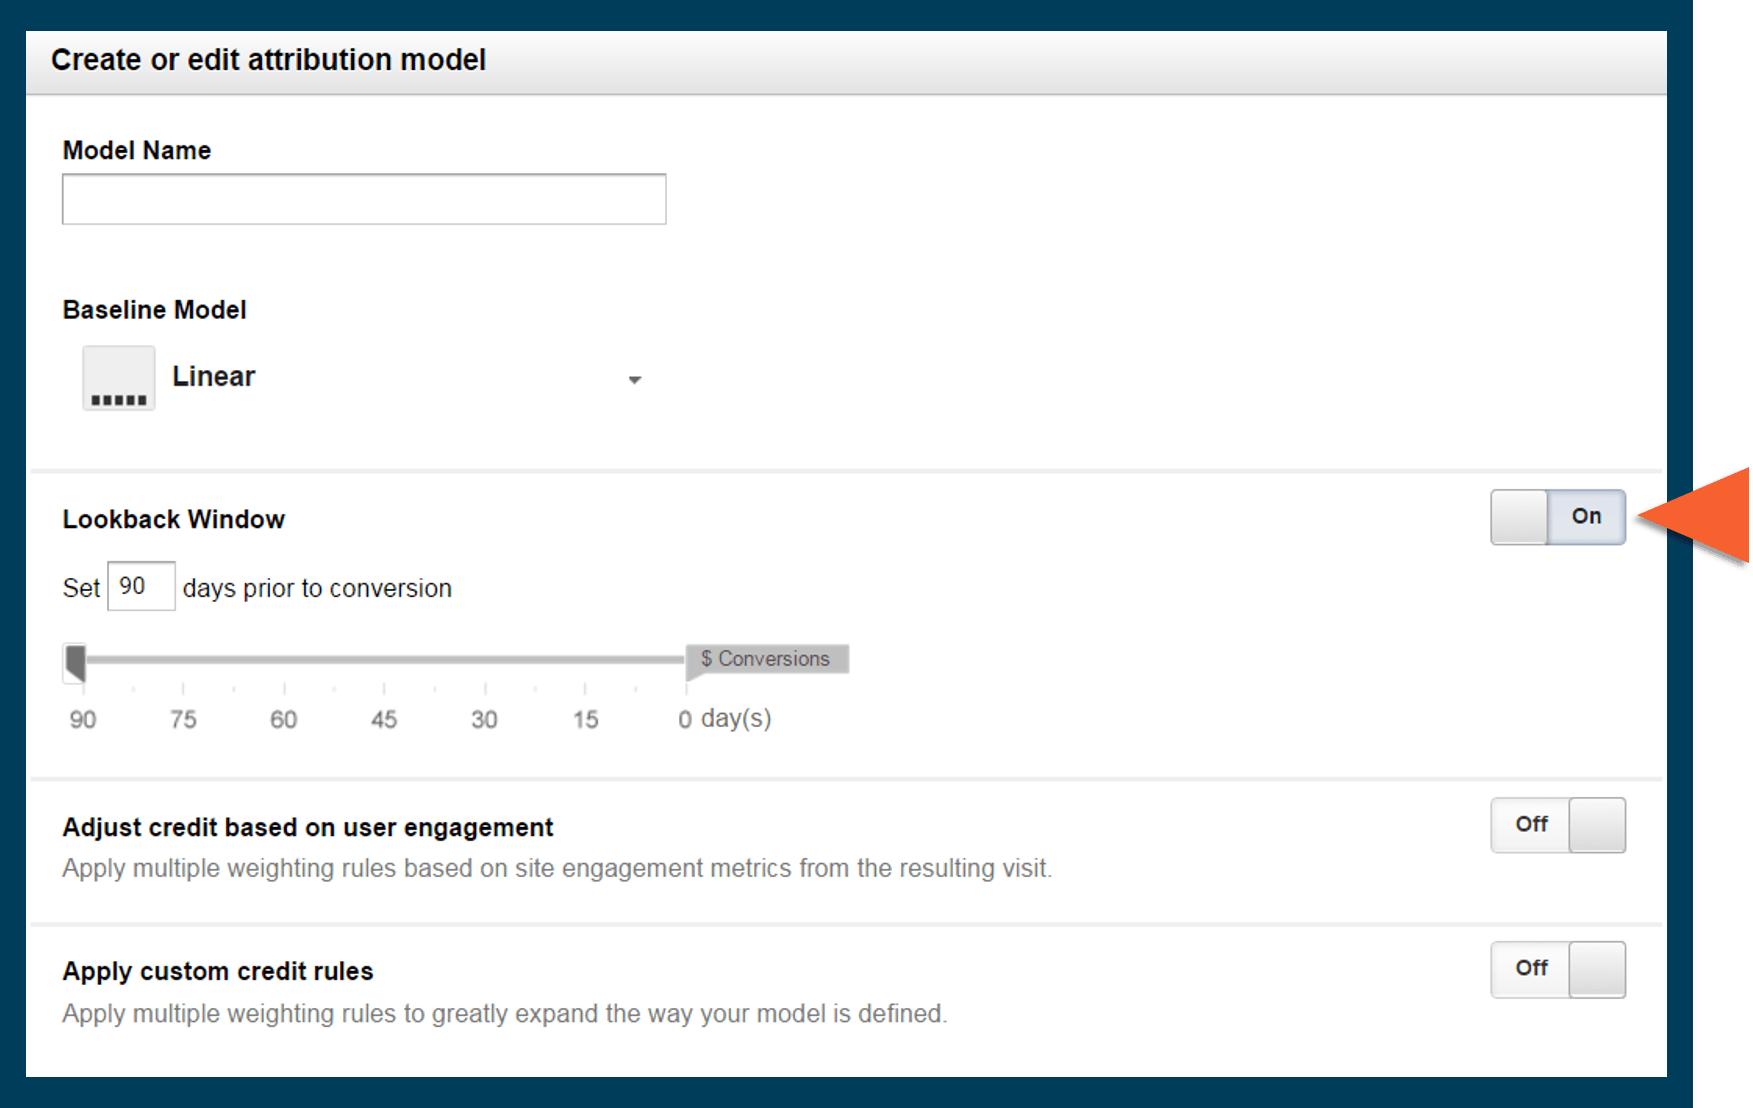
2. Choose your lookback window
Most of us will have set a lookback window before, so this shouldn’t be a ground-breaking step. Don’t automatically copy across your lookback window from AdWords though – it might not necessarily work the same for Analytics. Make sure you’re considering all the variables, like time lag and customer insights.
3. Modify the credit allocation
If you’ve chosen a Positional Based Model for your baseline, you’ll get the option to change the amount of conversion credits based on the position.
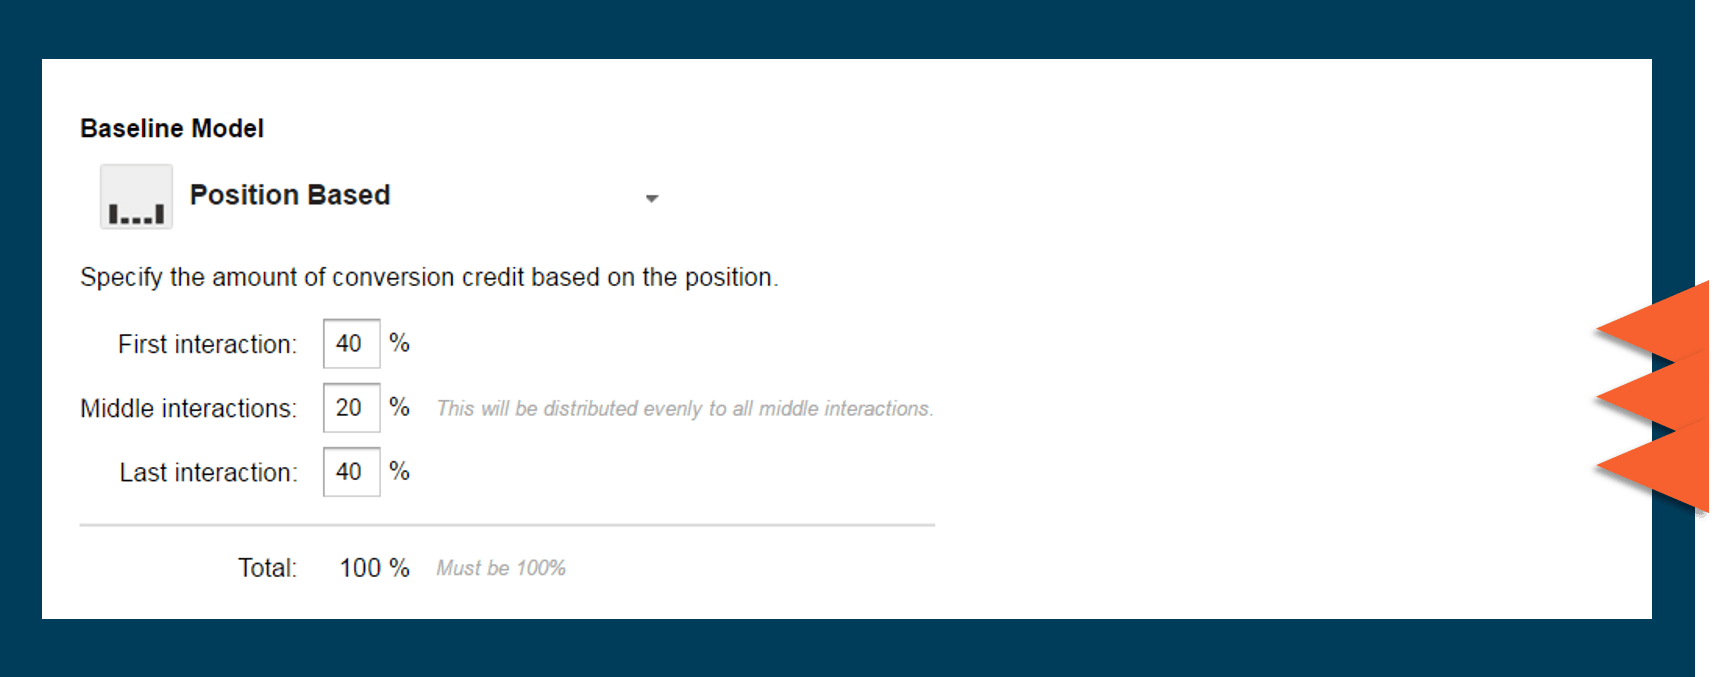
N.B – You used to be able to change impression value at this stage, but Google has since removed that option.
4. Change credits based on engagement
This step is entirely optional but, if you want to, you can weight an interaction based on the time on site or page depth.

Before you do this, you should really look at whether the time on-site actually impacts conversions. Start segmenting out your data and look at user behaviour. If time on site does affect interactions to some degree, it may be worth activating this step.
5. Add in some custom rules
This is the part that really differentiates your custom model. In this step, you can add rules based on one or more conditions.
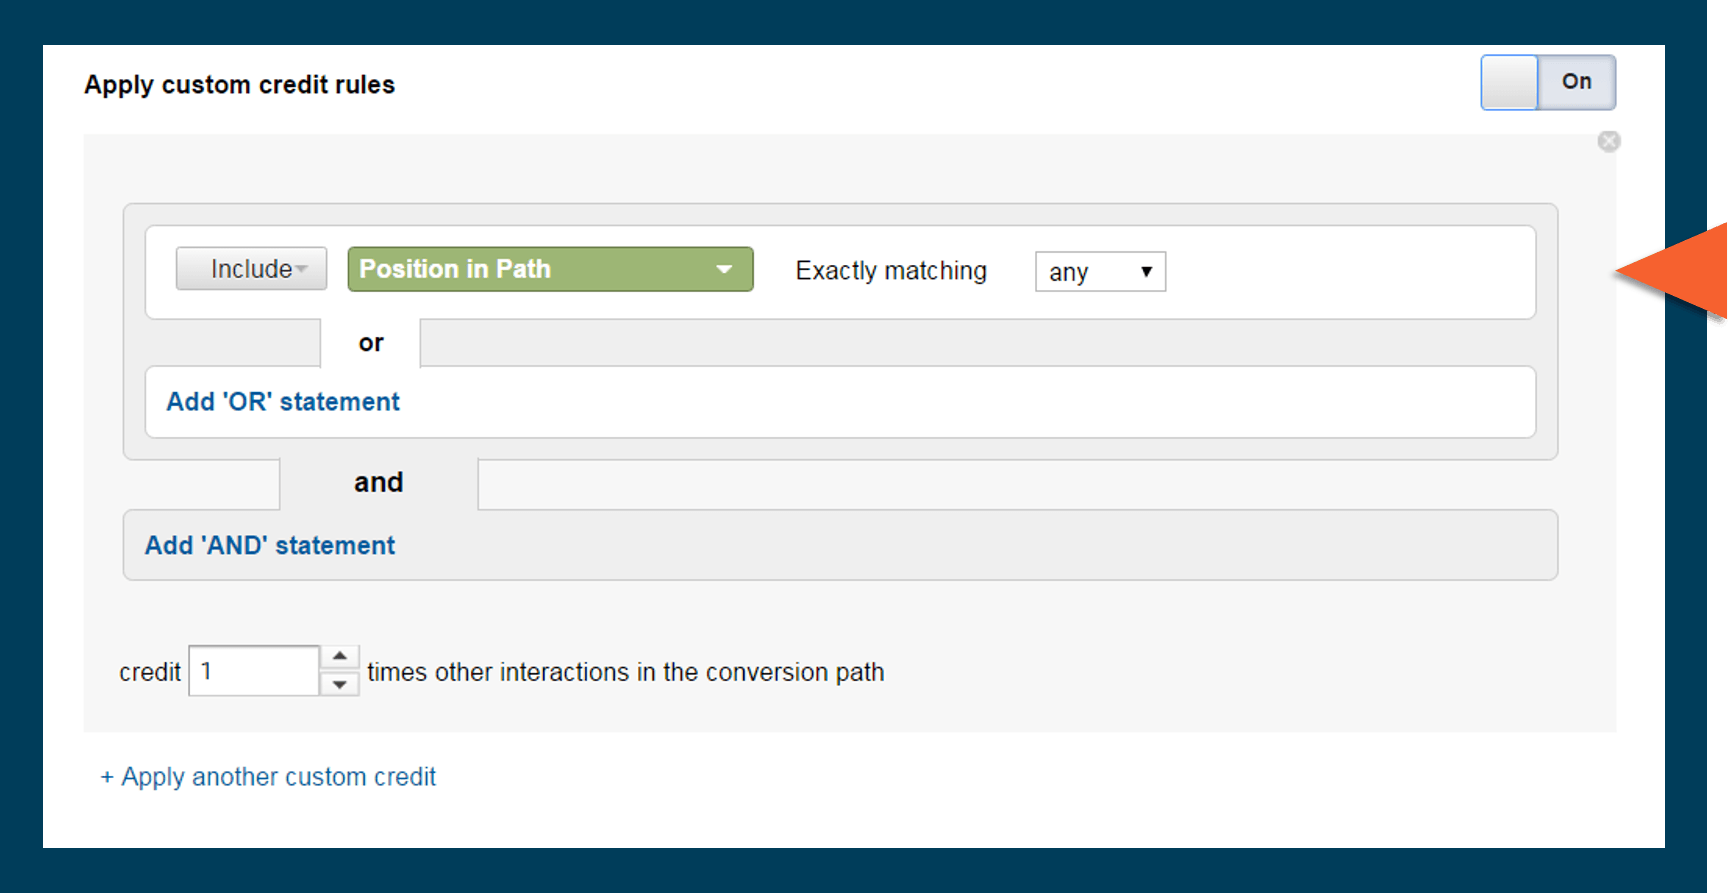
These new custom rules are the point at which you differentiate between different touchpoints in the user journey. You can more accurately define what level of credit each touchpoint gets in the conversion path.
You can apply custom rules based on pretty much any primary dimensions in Google Analytics, whether that’s interaction by position in the path, or specifying the channels within a custom channel grouping or anything else you might come up with.
6. Reporting!
Finally, the step we all love! Reporting should be the step where you can successfully use your custom model to drive better insights. So don’t forget to keep your models on track. Use data and reasoning behind each modification.
Once you’ve done this, you can use this across multiple views (or accounts, if you’re an agency) by simply sharing the model. Don’t worry, only the model gets shared, not the data.
After you’ve set up your custom attribution model, you can start using it straight away. But remember, you should be changing your attribution model to test out new hypotheses and between different campaigns. Attribution modelling isn’t set and forget – so keep trying out new variations.